Thursday, May 29, 2008

Polenta-Quinoa Sticks for Beautiful Bones

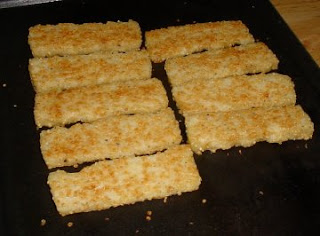
Polenta, that Italian soul food, has become one of our family staples since we embarked on our gluten-free lifestyle. We tried and liked the Polenta Fries recipe invented by Gluten-Free Gobsmacked, but wanted a little more texture and nutrition packed into our sticks, so Dan, our resident Slow Food Chef, has been experimenting with a blend of cornmeal and quinoa and now we have a new favorite polenta recipe. The quinoa adds a lot more protein, vitamins and a lovely bit of nubby texture. You can eat your sticks au naturel or topped with roasted vegetables or your favorite sauce.


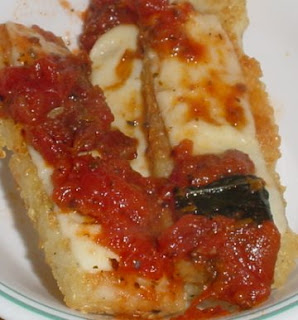
We've grown to like Polenta Parmigiana, some sticks cooked up on the electric griddle to crusty perfection, then topped with a slice of mozzarella cheese. This is left to melt, about 5 minutes, and then a little marinara sauce is slathered on to cap it all off. Terrific!

Polenta Parmigiana also provides a calcium-rich trifecta with cheese, quinoa and tomatoes, so I am going to submit this recipe for the Beautiful Bones event sponsored by Food Blogga to promote awareness of osteoporosis. While everyone suffers some degree of bone loss as they age, women and people with celiac disease need to take special care to ensure that they have enough calcium in their diets to ward off the potential for developing osteoporosis and bone fractures. I take a daily multi-vitamin with extra calcium and try to ensure that our family's diet includes enough leafy green vegetables, soy and dairy products, whole grains and beans, but it takes some vigilance to keep the nutritional balance going in a busy work and school week.

Be sure to check out Food Blogga's great site and her subsequent roundup of bone-healthy recipes which will be posted after the May 31st deadline for this event.


And now to bone up with a great recipe for:

Polenta-Quinoa Sticks

¾ cup cornmeal
½ cup quinoa
4 cups water
Salt and pepper
2 Tbsp. olive oil

Put in cornmeal, quinoa, water and salt and pepper in a microwave-safe bowl and stir. Cook at 100% for 7-1/2 minutes. Stir again and cook 7.5 minutes. Your bowl is uncovered throughout the cooking time. (You can also make the polenta-quinoa in a pot on the stove by bringing all ingredients to a boil, then lowering the heat, covering the pot and simmering for 20 minutes, or until quinoa is al dente. Let sit, covered, for ten minutes and then fluff up.)

Cool 5 minutes. Add olive oil and stir to blend well. Put mixture in greased loaf pan. Cool to room temperature. Cover with plastic wrap and refrigerate until firm, about 3 hours. You can also leave this for several days if life intervenes and you have to attend to other events (Voice of Experience!) with no ill effects to your eventual sticks.

Invert on cutting board. Cut it into 16 slices (1/2 inch thick).

Spray olive oil on griddle. Heat to High (400 degrees F) and cook and turn until browned and crusty, about 20-30 minutes.

As noted above, we like our sticks alla Parmigiana, with a slice of mozzarella laid on top of the golden sticks. This takes about 5 minutes to melt. Then top with a tomato marinara sauce and you’ve got a tasty, healthy dinner that will pamper your bones!

Serves 6.
Monday, May 26, 2008

Lime Cheesecake with a Raspberry Swirl, Decadently Gluten-Free


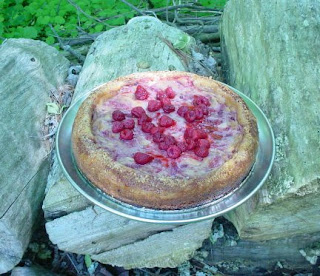
June's Royal Food Joust at the Leftover Queen's Foodie Blogroll involves the use of raspberries, limes and almonds. This fun cooking challenge encourages the participants to use three ingredients picked from the previous month's winner and this fruity troika immediately made me think of cheesecake. I was planning on bringing a dessert to our family Memorial Day barbecue, and after a little bit of experimentation and cookbook research, decided on this twist on my basic cheesecake recipe.

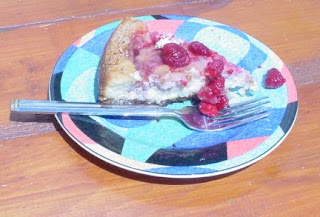
It was a hit with all dessert lovers and the lime made a nice and tangy middle. The nut crust eliminated the need for any wheat flour, so it's a naturally gluten-free recipe that satisfied everyone's sweet tooth.

Lime Cheesecake with a Raspberry Swirl

Crust:
1 10 oz. bag sliced almonds (about 2 cups)
¼ cup butter, melted
¼ cup brown sugar

Filling:
2 lbs. cream cheese, softened (I used half regular cream cheese and ½ low-fat cream cheese)
1-1/2 cups sugar
Juice of 2 limes
Pinch of salt
4 eggs

Raspberry Swirl:
6 oz. frozen whole raspberries
1Tbsp. cornstarch
½ cup sugar

Butter a 10 inch springform pan. Preheat oven to 350 degrees.

In food processor, process almonds until they are a fine meal. Dust bottom and sides of springform pan with almond meal. Add melted butter to remaining almonds and mix in brown sugar. Press onto the bottom of the springform pan.

In a large bowl, beat cream cheese and sugar with electric mixer until well blended, 1-2 minutes. Add lime juice and salt and beat another minute. Add eggs one at a time, beating after each addition.

Pour cheesecake filling into prepared springform pan. Place on a cookie sheet.

Reserve a handful of raspberries for garnish. Place rest of raspberries and sugar in a small saucepot and bring to a boil, stirring. Add a tablespoon or two of water if this mixture needs a little more juice. Mix cornstarch with 2 Tbsp. water and blend into raspberries after they reach a boil. Lower heat and cook, stirring, about 5 minutes, or until thickened.

Swirl in raspberry puree into cheesecake, working rapidly so as to avoid turning the entire cheesecake pink. I found that working clockwise and making eight small swirls on the outer edge and one central swirl worked well.

Bake cheesecake at 350 degrees in center rack of oven for 50-60 minutes. Let cool on a rack until room temperature. Then cover and refrigerate overnight.

Garnish cheesecake with reserved raspberries.

Makes 8-10 servings.

Thursday, May 22, 2008

Pasta with Creamy Asparagus-Herb Sauce

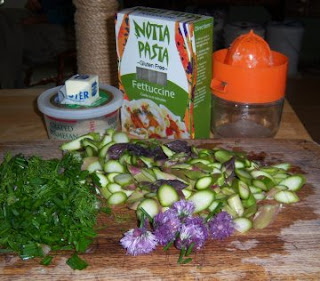
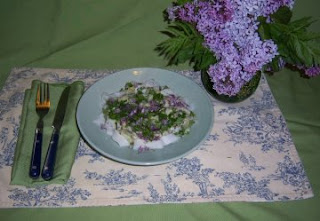
The first bedroom that I didn't have to share with my brother was painted a beautiful lavender with soft green trim, which has remained one of my favorite color pairings. Today, inspired by my spring garden offerings, I whipped up a beautiful rhapsody in pastel greens and purples to toss with our pasta dinner and while Dan thought it was "okay" and the girls didn't appreciate having "grass clippings" sprinkled all through their noodles, I thought this dish was a knockout...beautiful, delicately-flavored and perfumed with chives, dill, lime and lemon balm. My family are all just a bunch of pastel-hating Philistines.

Here is my palette of assembled ingredients:


Pasta with Creamy Asparagus-Herb Sauce

1 lb. gluten-free pasta
1 bunch asparagus, sliced into 1/2 inch diagonal slices
Juice of 1/2 lime
1/2 cup snipped chives and 7-8 purple chive blossoms, separated into flowerets
1/2 cup snipped fresh dill
1/2 cup shredded lemon balm
2 Tbsp. rice flour
1/2 cup milk
4 Tbsp. butter
4 Tbsp. extra-virgin olive oil
Salt and pepper to taste
Grated Parmesan cheese

Cook pasta in boiling water and drain. Rinse with warm water.

While pasta is cooking, heat 2 Tbsp. butter and 2 Tbsp. olive oil in saute pan until hot. Add asparagus and half of chives, lemon balm and dill. Cook, stirring, about 4-5 minutes, or until asparagus is just tender. Remove from pan and set aside.

Heat remaining butter and olive oil in same pan. Add rice flour and stir 1 minute. Add milk slowly, stirring all the while, to make a cream sauce. Add half of remaining herb trio, lime juice and season to taste with salt and pepper.

Toss cream sauce with pasta and garnish each serving with rest of herbs and chive blossoms. Serve with grated cheese on the side.

Serves 6.


I am submitting this recipe to the Weekend Herb Blogging Event started by Kalyn of Kalyn's Kitchen over two years ago and hosted this week by Sweetnicks. This is my first submission to this fun and informative event and I am looking forward to a roundup of other great recipes using fresh ingredients from the market and our gardens.

Wednesday, May 21, 2008

Parti-Colored Pasta with Vegetables


I've been really digging my new cast iron wok. I used to have a wok like that when I had my first post-college apartment with my roommate Irene and we cooked a lot of stir-fries for our suppers. Until.... disaster struck. We were both at the stove, chopping and stirring, when a bolt of electricity shot out from the ring underneath the wok shorting out the burner and blasting past in between our astonished selves.

BAM! As one celebrity chef might say.

That was the end of our wokkery, as we both decided to donate the offending item to our favorite thrift shop the next day rather than risk our skins further. It was probably the fault of our cruddy electric apartment stove, but we didn't want to wok on the wild side.

Fast forward a couple of decades, and here I was, prowling yet another favorite thriftery when I saw my present wok, still encased in its original box and cuddling its instruction booklet. My heart swelled with fondness and I had to adopt it.

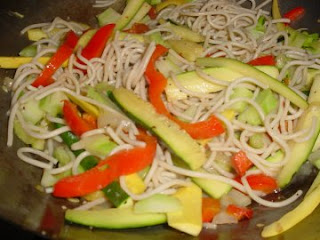
I have a gas stove now, so my fears of electrocution are groundless. I scrubbed it up, seasoned it well and now have a new favorite cooking pot. Woks are great for evenly distributing cooking heat and can double as a deep fryer. Mostly I use my wok for sauteeing up veggies, but they are great also for reheating and re-treating leftovers. Here's a recipe for a beautiful pasta dish that provided a refrigerator roundup of some leftover pasta and crudites. It tasted and looked so good that it will be added to our permanent recipe files.

Parti-Colored Pasta with Vegetables

2 small zucchini, ends cut off and cut into slim spears
2 small yellow squash, ends cut off and cut into slim spears
1 red pepper, seeded and cut into strips
8 oz. cooked pasta (make sure it's gluten-free if you can't eat the wheat!)
1 medium onion, sliced in half and then sliced thinly
5 cloves garlic, rough chopped
3 Tbsp. butter
2 Tbsp. olive oil
1/3 cup white wine
1/2 tsp. dried rosemary, crumbled
1/2 tsp. dried thyme, crumbled

Heat oil in wok until hot. Add butter and melt. Add garlic to pan and stirring constantly, cook 1 minute. Add onions and cook another 2-3 minutes, stirring constantly.

Add white wine and cook 2-3 minutes, until liquid reduces. Add remaining ingredients and cook, stirring, 5-7 minutes, or until squash and peppers are crisp-tender.

Serves 4.

Tuesday, May 20, 2008

A-peeling Cuisine

U.S. economic and political honchos may debate it, but here at the Wheat-Free, Meat-Free Think Tank and Test Kitchen, our experts all agree that food and gas prices are eating up an ever-larger amount of the weekly income, so it's time for some serious belt-tightening.

Eating gluten-free means avoiding all those cheap, nutritionally-devoid pre-packaged ramen noodles, mac and cheese boxes, high-fructose corn syrup-infused processed foods that clog up most of the grocery aisles. The siren call of the gluten-free frozen dinners is tempting (especially during softball season and this busy end-of-the-school-year) but they are a luxury item that simply can't be shoehorned into our weekly food budget. What's a Gluten-Free Mama of two voracious teenagers to do?

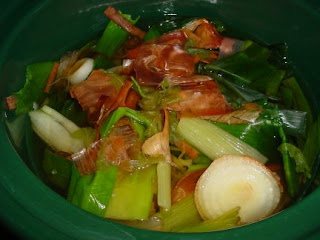
Well, don't tell my kids, but they're dumpster diving in their own house these days. I normally consign vegetable scraps to the compost bucket for our garden (a significant part of my winter exercise program is suiting up for those hikes out to the backyard in knee-deep snow). I resurrected my vegetable scrap freezer container and fill it with onion skins, celery and carrot trimmings, leek leavings and other veggie detritus, a trick I picked up one summer as a waitress/kitchen grunt in a great restaurant. Make sure the scraps are rinsed free of dirt. I don't put in remnants from the cabbage family or peppers, because their taste would be overpowering in the pot broth I later make from these leftovers.

Whenever the scrap container is full, I pop as many scraps as I can into my large crock pot, fill it with water and a couple of teaspoons of salt, then cover and cook on high for 4-6 hours. Then I strain the broth and use it in soup or as cooking water for rice or quinoa. I made an awesome spinach risotto the other night (recipe in a later post) using some of this precious broth and even Popeye couldn't have elbowed his way in to get a serving after it was pounced on by my normally spinach-detesting teens.


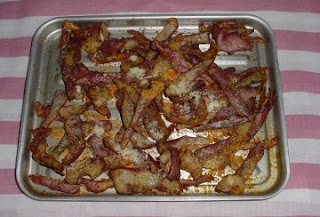
I leave the skins on our potatoes in a lot of recipes, but for those dishes that require spud nudity, I save the peels for a delicious snack that I have modified from Volume III of Amy Dacyzyn's fantastic and entertaining Tightwad Gazette book (NY: Villard, 1996). You want to avoid peels that have bad spots and eyes, but the other peels can be used for a quick appetizer. I haven't found that potato peels freeze well, because they turn an unsightly grey once air hits them, so I make this snack the same day. If I am using the oven to cook up the rest of our meal I use that, but if not, it's more economical to whip these up in the toaster oven. Here's the recipe:

Spicy Potato Curls

Peels from 4-5 medium potatoes
1 Tbsp. vegetable shortening
3 Tbsp. grated Parmesan or Romano
2 Tbsp. of your favorite seasoning mix (steak seasoning, garlic pepper, or a mix from your spice cabinet. We like a blend of garlic powder, chili powder, salt, pepper and sage, but you could also vary this to be Greek, Indian, Mexican, or Italian with appropriate seasonings)

Grease cookie sheet or toaster oven tray with shortening. Toss potato peels with seasonings and spread on tray. Bake in a 400 degree F oven for 10-15 minutes, turning peels at least twice during cooking time to ensure that they are appropriately crispy.

Sprinkle cheese on potatoes and bake another 3-4 minutes, or until cheese is browned. Hover over your peels during this last baking time to make sure that they don't burn.

Serve immediately.

Makes 2-4 snack servings.

Monday, May 19, 2008

Go Ahead Honey, Those Taters are Gluten-Free


Naomi over at Straight into Bed Cakefree and Dried is hosting this month's "Go Ahead Honey, It's Gluten-Free" cooking challenge. The May theme is breakfast and we certainly love to have our breakfasts in our house; sometimes a second breakfast too, if we're feeling hobbity. Come to think of it, breakfast for dinner is a good idea also.

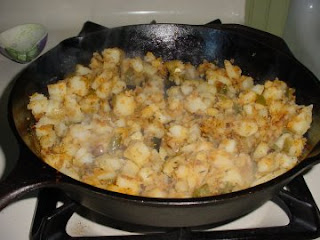
The naturally gluten-free potato is often featured on our breakfast table and the recipe below is a versatile favorite. We have two well-loved cast-iron frying pans which we wipe out carefully after use to preserve the layers of seasoning that keep foods from sticking. If you don't have this kitchen staple on hand, another kind of frying pan will do, but you may have trouble getting the spuds crusty enough.


Breakfast Fried Potatoes

5 potatoes, peeled (Save the peels for tomorrow's secret recipe!)
1 large onion, diced
1 green pepper, seeded and diced (other color peppers are lovely too)
Canola oil for frying
3 Tbsp. seasonings of your choice. We like sage, salt, pepper, paprika, garlic powder and chili powder, but adjust to your mood)

Cut potatoes in half and then cut into medium dice. Place potatoes in salted water in a medium pot and bring to boil. Lower heat and cook until softened, about 15 minutes.

Drain and reserve.

Get your frying pan heated up and then add 2-3 Tbsp. canola oil. Let the oil warm up and then toss in onions. Cook until soft (5 minutes), then add peppers and seasonings. Cook until peppers are softened (another 3-4 minutes), then add potatoes. Keep an eye on the stove and stir up potatoes every couple of minutes, so that a nice crust forms on the bottom of the pan that can be scraped up and mixed in with the rest of the vegetables. When this fry-up is at its crustiest peak (5 more minutes) adjust seasonings and serve.

Makes 4 hearty breakfast servings.


The Go Ahead Honey, It's Gluten Free Challenge will continue through tomorrow, so there's still time to get cracking (those eggs) and join the fun. Check out Naomi's great gluten-free blog for more information http://milkforthemorningcake.blogspot.com/2008/04/go-ahead-honey-its-gluten-free-may.html.

Tuesday, May 13, 2008

Quinoa and Asparagus Salad


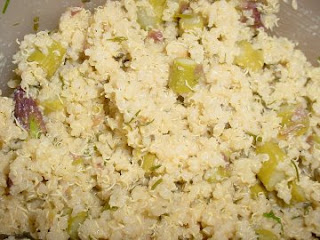
There were finally enough asparagus spears to plunder from the garden, so I snapped them out and gathered up some of their garden buddies: snippets of chives, a handful of lemon balm and a few sprigs of fresh thyme and dill. The herbs were rinsed and minced, the chubby stalks of asparagus were cut into 1/2 inch chunks and then they were briefly steamed up in the last minutes of making a pot of quinoa. Then all were reunited with a mustardy vinaigrette and on our dinner table within the hour.

That's what I love most about the kitchen garden. I can step outside and shop in my own farmer's market and figure out a recipe based on what's ready and looks good. All of the greens above are perennials (dill is an annual but reseeds itself all over the place, so I just "weed" it out as needed) that overwinter easily in our Zone 4 garden plot and that makes this a fresh, frugal bonus.

Quinoa and Asparagus Salad

1 cup quinoa, rinsed
2 cups water
6 asparagus stalks, cut into 1/2 inch chunks
1 Tbsp. snipped fresh dill
1 Tbsp. snipped chives
1-1/2 tsp. fresh thyme leaves
3 Tbsp. lemon balm, sliced thinly (substitute a splash of lemon juice)
1-1/2 Tbsp. Dijon mustard (coarse ground mustard would also work well)
1/4 cup extra-virgin olive oil
Couple of splashes of rice vinegar
Kosher salt and pepper to taste

Place quinoa and water in small pot and bring to a boil. Lower heat, cover and simmer until almost done, about 20 minutes. Toss asparagus chunks on top and cover. Cook another 3-4 minutes, or until asparagus and quinoa are al dente.

Mix together remaining ingredients into a vinaigrette. Toss with warm quinoa and asparagus. Let cool a few minutes and then fluff up and serve either warm or chilled.

Makes 6 servings.

Thursday, May 8, 2008

Hudson Falls Gluten-Free and Dietetic Cakes


There's a new gluten-free bakery in the North Country, Hudson Falls Cakes, operated by Kathy LaPan out of her home. Kathy specializes in custom orders, like special occasion decorated cakes and other goodies. With personal experience in gluten-free baking for her celiac grandmother and in sugar-free baking for herself (she's a diabetic), Kathy is a specialist in "digestible comestibles", as she describes it on her website. Kathy notes that she can also whip up milk/casein-free, peanut-free, egg-free, and other allergen-free sweets , so if you are looking for a fancy cake for a special birthday, anniversary or wedding, check out her website or give her a call at (518) 747-4854.

Hudson Falls Cakes will be offering samples of their baked goods at the August 5th meeting of the Glens Falls Celiac Association at Glens Falls Hospital at 6:30 pm, so plan to attend if you would like to speak with Kathy in person and see what kinds of goodies she can whip up.

Wednesday, May 7, 2008

Adopt A Gluten-Free Blogger Event Reminder


Just a quick reminder that the Adopt a Gluten Free Blogger event, started by the Book of Yum and hosted this month by yours truly is running until this Sunday, May 11th. I have gotten a few dee-licious entries already, so make sure to post and send me your info so I can get a roundup ready next week.

Sunday, May 4, 2008

Adopt A Gluten-Free Blogger: Fresh Ginger

For the third installment of the Adopt A Gluten-Free Blogger Event I chose Fresh Ginger.
I had the impression from her blog name and pineapples lounging on the beach masthead that she lived in Hawaii or some other Pacific paradise, but it turns out that she's a Michigander. Ginger is also a beer and cider brewer, gardener, knitter and from a family of fruit farmers, so her blog is an interesting mix of these interests.

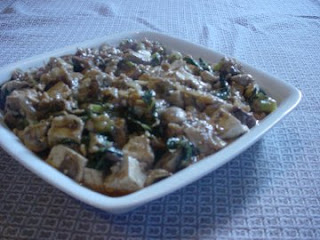
Fresh Ginger also provides a lot of cocktail and appetizer recipes which I have bookmarked for future consumption. However, the recipe that triggered her adoption was for Lard Nah, which does not contain lard, thankfully, but is a traditional Thai noodle dish. This worked out beautifully in my wok with some collard greens, tofu and mushrooms, although I did hold back on the amount of water mixed with tapioca starch as my Lard Nah seemed adequately hydrated. This is really a tasty stir-fry dinner with delicious sauce that I look forward to trying with other garden greens.

A note of caution to other gluten-free folk who want to check out this great blog. Fresh Ginger is able to tolerate spelt, so if you can't eat any kind of gluten, not just wheat gluten, please do not cook up any recipes using spelt.

If you are interested in adventurous cooking from around the globe, this is the blog for you. Fresh Ginger features lots of different cuisines: Scandinavian, Indian, Thai, Cuban, etc., and has a breezy, fun writing style, so it's a lot of fun to read. I look forward to cooking up some more of her wonderful recipes, and soon!

The Adopt A Gluten-Free Blogger Event, started by Sea at the Book of Yum, continues until May 11, 2008, so look for a roundup after next weekend. There's still time to participate in this event and if you are interested in doing so, check out this link.

Friday, May 2, 2008

Chocolate-Nut Fudge

Just about the easiest recipe I have in my trusty index card file is this one for fudge. Four ingredients, two steps, that's it. We needed some extra sweets for the book signing tomorrow at our shop, the gluten-free book signing and this fit the bill, as I was spending the day in the kitchen while Dan manned the shop.

You can make this fudge with any flavor of morsel, not just chocolate chips, so think butterscotch, peanut butter, white chocolate.....
Just be sure to check that all ingredients are gluten-free.

Here's the easiest recipe you'll ever try:

Chocolate-Nut Fudge

1 (12 oz.) pkg. chocolate chips
1 (14 oz.) can sweetened condensed milk
1 cup chopped walnuts
1 tsp. vanilla

Place chips and milk in a small pot and heat over low flame until melted, stirring every minute or so. This takes about 5 minutes. Add nuts and vanilla.

Butter a 9x9 or 7x10 pan. Pour fudge into pan and spread evenly. Cover and refrigerate until firm (about 2 hours).

Cut fudge into squares.

That's it! And it tastes like you sweated all day over a hot stove.

Makes about 24 pieces of fudge.

Thursday, May 1, 2008

Spanish Rice in the Crockpot


I have been getting a real kick out of Stephanie and her blog, A Year of Crockpotting, chronicling her self-professed obsession with her kitchen appliance. Every day Stephanie produces a new slow cooker recipe, mostly meaty stews and soups, but also an astonishing variety of cookies, caramel corn, play dough and vegetarian dishes. Her writing is very funny and the recipes are neatly broken down and have lots of photos to show the assembled ingredients pre- and post-crockpotting.

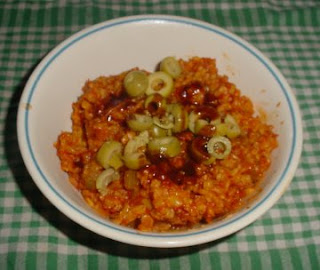
All of the recipes are also gluten-free. Stephanie uses a lot of naturally gluten-free ingredients and for the baked goods, she uses gluten-free flour mix. The other day I wanted to whip up dinner while we were running around doing several different work/kid/store/garden/dog/cat projects and so I turned to A Year of Crockpotting for inspiration. She had a Spanish Rice recipe which I have modified below for the in-house vegetarian and vegan. Brown rice always takes an preternaturally long time to cook in our house, so the crockpot worked great. The rice came out soft but chewy and soaked up all the yummy sauce.

Spanish Crockpot Rice

2 Tbsp. olive oil
1 onion, diced
6 cloves garlic, finely chopped
4 stalks celery, diced
1 green pepper, seeded and diced

2 cups brown rice
1 (28 oz.) can crushed or diced tomatoes and water to make 4 cups liquid

Couple of glugs of hot sauce (I like Frank's Louisiana Red Hot, the chicken wing sauce)
1 Tbsp. chili powder
Salt and Pepper to taste

Heat oil in frying pan. Add onions, garlic, pepper and celery. Saute until softened.

Dump into large crockpot (mine is 4 quarts). Add remaining ingredients.

Cook on high heat for 4 hours, then turn to low for at least another 3 hours, until rice is done. Stir every once in a while. We actually let it go another two hours, cause noone was home to deal with it. Season to taste with salt and pepper.

Top with your favorites: sliced green or black olives, sour cream, grated Cheddar, more hot sauce, sliced scallions.

Serves 6-8.

I am submitting this recipe in Just Get Floury's Dollar Dish Duel, which challenges participants to cook up some grub to feed at least two people for $5. I estimate this recipe cost right around $5, minus the toppings, and this served our family of four one night for dinner, with enough leftovers for another round of meals, so this was a frugal recipe indeed.

There is still time to enter the Dollar Dish Duel, as entries aren't due until May 6th, so get cooking.